AI Toolbox
Guides for AI matting, local editing, image-to-prompt, image compression, ID photos, object removal, replacement, and icon generation.
The AI Toolbox provides ready-to-use image utilities covering high-frequency needs: matting, local edits, prompt extraction, compression, ID photos, and icon generation.
This is a product usage guide. These steps apply to the PixMind web tool, not the API. Developers should read the API quickstart instead.
AI matting
Upload an image and remove the background in one click.
AI local edit
Mark a region and edit part of an image.
Image to prompt
Upload an image and reverse-engineer an AI drawing prompt.
ID photos
Make standard-compliant ID photos with background and outfit swaps.
Recent tool guides
Choose a task guide for inputs, settings, outputs, and common questions.
Image upscaling and HD redraw
Choose smart 2× or 4× upscaling, GPT Image 2.5 HD redraw, or a task-specific preset.
Image quality enhancement
Improve overall photo quality, lighting, and detail, then choose an output size and download.
Unblur images
Choose light, moderate, or strong blur presets for portraits, pets, and street photos.
Product photo enhancement
Enhance product photo clarity and material detail with a preset focused on shape, logo, and color.
Anime image upscaling
Upscale colored characters, manga line art, and anime scenes while retaining their drawing style.
AI professional headshots
Upload one photo, choose a professional style and ratio, then generate and download a headshot.
Video transcripts, summaries, and scripts
Choose transcripts, summaries, subtitles, or visual shot scripts, then copy or export results.
AI video remake
Upload a reference, analyze its shots, edit the creative direction, and select a model to generate a new video.
Video clipping
Split videos by scenes, fixed duration, or equal parts and download MP4 clips or a ZIP.
Video to GIF
Choose a video segment, width, and frame rate to create a silent looping GIF with current account limits.
Ad analysis and hook generation
Analyze UGC, Facebook, or TikTok video ads and generate opening-hook directions.
AI matting
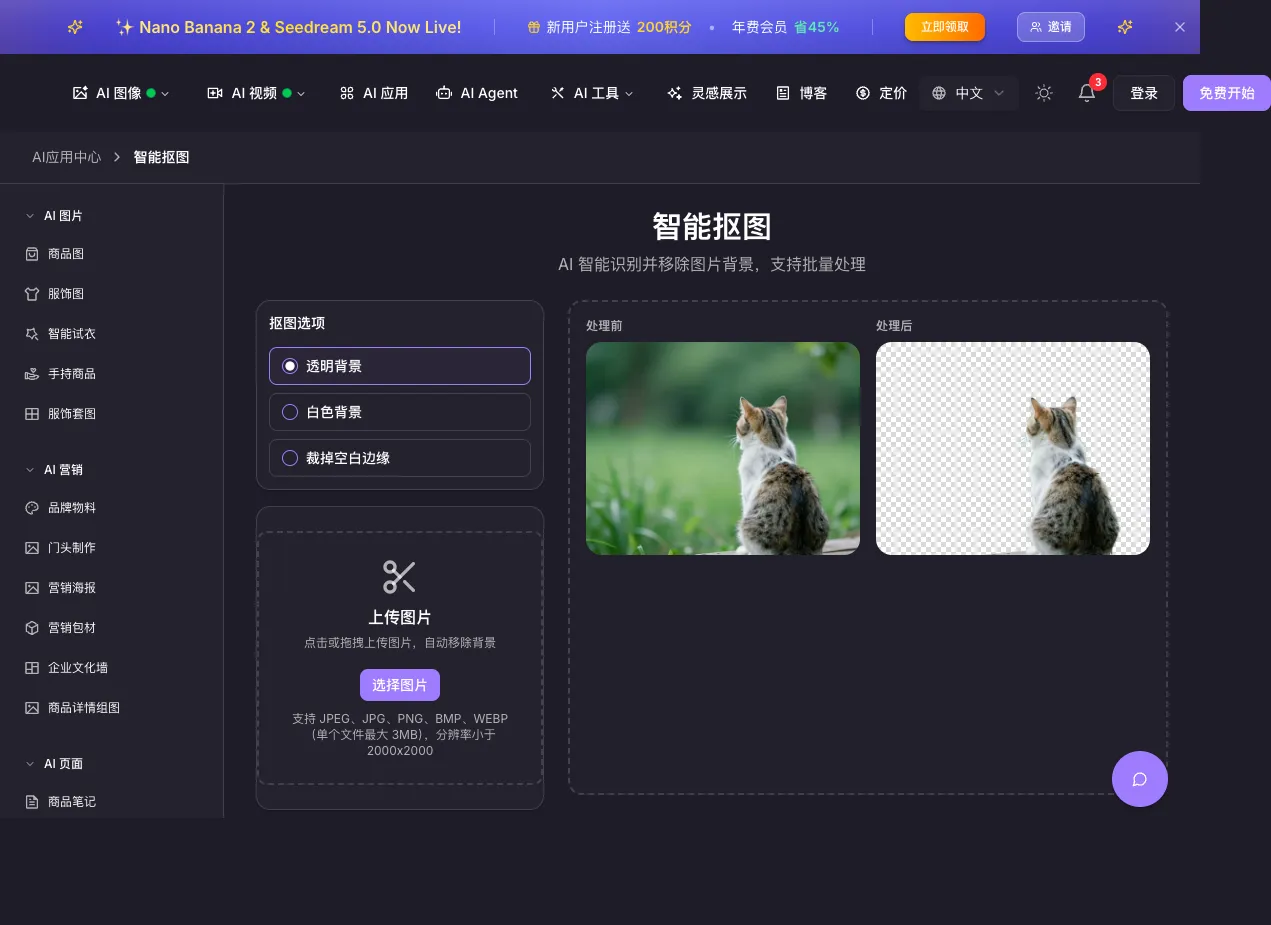
AI matting automatically detects the subject and removes the background in one click, producing a transparent PNG.
Highlights: accurate edge detection, results in seconds, smoothed edges without jaggies, batch processing.
Use cases: product hero images, ID photo background swaps, asset preparation, avatars, logo extraction.
Steps:
- Upload: drag and drop; JPG/PNG up to 10MB.
- AI processing: the subject is detected and the background removed automatically. Choose transparent, white, or cropped-to-content output.
- Fine-tune (optional): touch up edges with the brush tool.
- Download: transparent PNG with selectable size and high-resolution output.
Local editing
Local editing modifies or replaces a region of an image without touching the rest. Open the tool
Edit types: local repaint, local replace, local remove, local enhance.
How to use:
- Upload the image.
- Mark the region with the brush.
- Describe the change.
- Generate.
- Pick the best result.
Examples: remove bystanders, swap product backgrounds, change garment color, add decorations, fix flaws.
Image to prompt
Image to prompt analyzes an image and reverse-engineers a prompt for AI image generation. Open the tool
Value: learn how great images are described, recreate a similar style, get inspiration, and build a prompt library.
Workflow: upload a reference → AI analyzes features → a detailed prompt is generated → edit and refine → use directly in text-to-image.
The output typically covers the subject, style tags, colors, lighting, composition, and artistic references.
Image compression
Image compression greatly reduces file size while preserving visual quality. Open the tool
Options: smart (AI-optimized), quality-first, size-first, balanced.
Formats: JPG/JPEG, PNG, WebP, GIF (static).
Use cases: website optimization, email attachments, social uploads, storage savings, faster loading.
Results: 50–80% average compression, virtually imperceptible quality loss, batch support, selectable output format.
ID photos
ID photos produce standard-compliant ID photos with background and outfit swaps. Open the tool
Supported types: national ID, passport, student ID, work badge, and exam registrations.
Highlights: automatic matting and background swap, optional beauty retouch, outfit changes (suits, shirts), automatic sizing, standards-compliant.
Workflow:
- Upload a front-facing photo.
- Choose the ID photo type.
- Choose the background color.
- Choose an outfit (optional).
- Adjust retouching.
- Generate and download.
Tips: use a clear front-facing photo, even lighting without shadows, a natural expression with ears visible, and avoid glasses and hats.
Object removal
Object removal intelligently erases unwanted elements such as watermarks, bystanders, and clutter.
Removal types: watermarks, bystanders, clutter, skin blemishes, text.
Tips:
- Mark the area precisely.
- Process complex areas in multiple passes.
- Fine-tune manually and watch edge transitions.
Guarantees: seamless results, original texture preserved, intelligent background fill, multiple undo.
Replacement
Replacement swaps a specified element in an image for other content.
Scenarios: garment replacement, background replacement, expression replacement, brand/logo replacement.
Steps:
- Upload the original image.
- Mark the region to replace.
- Describe the replacement.
- Generate.
- Pick the best result.
Icon generation
Icon generation quickly produces icons in various styles for UI and brand design.
Icon types: app icons, website favicons, mobile app icons, brand marks, data visualization icons.
Styles: flat, dimensional, outline, filled, gradient, hand-drawn.
Workflow:
- Describe the icon: purpose, core elements, style preference.
- Choose parameters: color scheme, sizes, output format.
- Generate: review multiple proposals and download.
- Post-edit: adjust colors, refine details, export multiple sizes.